Setting up a project
Now that we are all set up, let's get going! First, let's go to our project directory:
$ cd ~/src
And then, we'll use cargo new to create a new binary project:
$ cargo new --bin intermezzos
     Created binary (application) `intermezzos` project
Feel free to name your kernel something else!
This will create a new directory, intermezzos, inside our project
directory. Let's move into it:
$ cd intermezzos
Cargo has created three things for us: a src/main.rs file, that contains
our Rust source code. A Cargo.toml, which contains metadata about our
project. And finally, a .gitignore, if you use git.
Sidebar: Rust knowledge
We don't inherently assume that you know Rust well, but this book also isn't a Rust tutorial. We'll try to explain the basics of the code we're writing, but you may want to check out The Rust Programming Language if you don't understand our basic explanations here. If you've never used Rust before, you might want to take a moment and skim Chapter 3, which covers the basic syntax and talks about stuff you've seen in programming languages you have used in the past.
Our first Hello, World
If you investigate the contents of src/main.rs, you'll find this:
fn main() {
    println!("Hello, world!");
}
Cargo generated a "hello world" program for us! Let's try it out:
$ cargo run
   Compiling intermezzos v0.1.0 (file:///~/src/intermezzos)
    Finished dev [unoptimized + debuginfo] target(s) in 2.5 secs
     Running `target/debug/intermezzos.exe`
Hello, world!
If you see the "Hello, world!" printed to your screen, then your Rust toolchain is working!
Hosts and Targets
This program is compiled for our own computer hardware and operating system. The computer we're compiling from is called the "host system." But, our new OS won't be using the OS of the computer we're doing development on! The computer we want to compile to is called the "target system."
When the host and target system are the same, most people just say "compiling." When they host and taget are different, people say that you're "cross-compiling."
To cross-compile, cargo takes an argument, --target. We can then tell it
what kind of computer we want to compile to, and it will do the right thing.
However, by default, Rust can't know every single kind of computer and OS
that we would want to compile to: after all, we're creating a new OS right
now!
To solve this, we need to write some JSON.
Creating intermezzos.json
Rust has a feature called "target specifications" that lets us, well, specify a target. To do that, we create a JSON file, and use it to describe all the things that the compiler needs to know in order to generate the proper code.
Create a new file named intermezzos.json and put this in it:
{
  "llvm-target": "x86_64-unknown-none",
  "data-layout": "e-m:e-i64:64-f80:128-n8:16:32:64-S128",
  "arch": "x86_64",
  "target-endian": "little",
  "target-pointer-width": "64",
  "target-c-int-width": "32",
  "os": "none",
  "linker": "rust-lld",
  "linker-flavor": "ld.lld",
  "executables": true,
  "features": "-mmx,-sse,+soft-float",
  "disable-redzone": true,
  "panic-strategy": "abort"
}
To learn more about this file, check out Appendix A. For now, it's mostly a distraction; you don't need to know what's going on here to continue.
Removing the standard library
Okay, let's write some Rust! Delete the code in src/main.rs, and replace it
with this:
# #![allow(unused_variables)]
#![feature(panic_handler)]
#![feature(core_intrinsics)]
#![no_std]
#![no_main]

#fn main() {
extern crate bootloader;

use core::intrinsics;
use core::panic::PanicInfo;

#[panic_handler]
#[no_mangle]
fn panic(_info: &PanicInfo) -> ! {
    unsafe { intrinsics::abort() }
}

#[no_mangle]
pub fn _start() -> ! {
    loop {}
}
#}
Let's go over the code, bit by bit:
# #![allow(unused_variables)]
#fn main() {
// ...

#![no_std]
#![no_main]

// ...
#}
These two attributes tell Rust, "hey, we don't want a standard library, and
we don't want a main function." When writing an OS, we want full control
over the details. The Rust standard library assumes that an operating system
exists, and we don't have any of that yet, so we can't use it. Rust's default
main includes stuff that we could use, but it's nicer to write our own,
so we have that full control.
# #![allow(unused_variables)]
#![feature(panic_handler)]
#![feature(core_intrinsics)]

#fn main() {
// ...

extern crate bootloader;

use core::intrinsics;
use core::panic::PanicInfo;

#[panic_handler]
#[no_mangle]
fn panic(_info: &PanicInfo) -> ! {
    unsafe { intrinsics::abort() }
}
#}
When we don't include the standard library, then we're missing one important
thing: if we panic!, Rust wants to call a callback before aborting. This is
that callback. All we do is abort our program.
The extern crate line will set up our bootloader, that is, the code that
loads our OS after the computer starts up. We'll talk more about this later.
Other than that, this is boilerplate. We'll talk about this stuff more when we actually do something on panics; for now, don't worry about it.
# #![allow(unused_variables)]
#fn main() {
// ...

#[no_mangle]
pub fn _start() -> ! {
    loop {}
}
#}
This is our main function, even though it's named _start. Have you ever
wondered how main gets called? Technically, _start gets called first,
then that calls your main function. Any setup code goes in _start, and
would run before it calls main.
Let's explain this function in a bit more detail. The #[no_mangle]
attribute says "hey Rust, it's really important that this function is named
exactly this." You see, Rust is free to rename functions for you. There's
good reasons for this that we won't get into here. This attribute disables
that. If Rust renamed this function, then we wouldn't be able to boot up
properly. We'll explain more in the next section.
The ! return type means we never return, and we never return because the
only thing we do is loop forever!
With this code, our little kernel will start, and then do nothing. It's a start!
Aborting on panic
While we set up a panic handler, that's not the only thing that occurs on
a panic. After our handler is called, Rust can do one of two things: abort
the entire program, or "unwind the stack." Since we're an OS, if our OS
panics, we want to abort. Unwinding can be useful for some applications, but
not an OS, as if we crash, it's all over. As such, we're going to skip over
explaining what unwinding is for now, and simply set things up to abort. Go
into Cargo.toml and add these lines:
[profile.dev]
panic = "abort"

[profile.release]
panic = "abort"
Cargo has a concept of "release profiles" that let us get a development build or a release build. With this configuration, we're telling the Rust compiler that we want to abort when a panic occurs.
Including a bootloader
Earlier we had an extern crate line talking about bootloader.
We need to add that to our Cargo.toml:
[dependencies]
bootloader = "0.6.4"
Compiling with bootimage
Now that we have our code, it's time to compile it! First, we want to make sure that we are using the nightly version of Rust, so run this:
$ rustup override set nightly
Now, any time we're in this project, rustup will ensure we're using nightly
Rust, automatically.
To build the project, we use the bootimage tool we installed earlier. Run this:
$ bootimage build --target=intermezzos.json
The target flag must have the same name as the .json file you've made, so
if you picked a different name, make sure to use it here!
You should see some output that looks like this:
$ bootimage --target=intermezzos
   Compiling core v0.0.0 (file:///~/.rustup/toolchains/nightly-x86_64-pc-windows-msvc/lib/rustlib/src/rust/src/libcore)
    Finished release [optimized] target(s) in 65.72 secs
   Compiling intermezzos v0.1.0 (file:///~/src/intermezzos/intermezzos)
    Finished dev [unoptimized + debuginfo] target(s) in 0.82 secs
Downloading bootloader...
Creating disk image at bootimage.bin
If you remember from Chapter 2, we installed two tools: bootimage and
cargo-xbuild. In this case, what happens is:
bootimagecallsxargoto compilelibcore, Rust's smallest library.cargo-xbuildcallscargoto build our OS, passing flags to use that newlibcore.cargocallsrustcto actually compile our OS's code itself.bootimagethen takes our code and makes a.binfile.
Whew! That's a lot of stuff. We'll go over the details of what exactly these
steps mean in the next section. But at this point, if bootimage.bin exists,
you've successfully compiled your very first OS! It doesn't do much, but
everyone starts somewhere.
Running with qemu
Let's try running it! To load up our OS in qemu, type this:
$ qemu-system-x86_64 -drive format=raw,file=bootimage.bin
You should hopefully get something that looks like this:
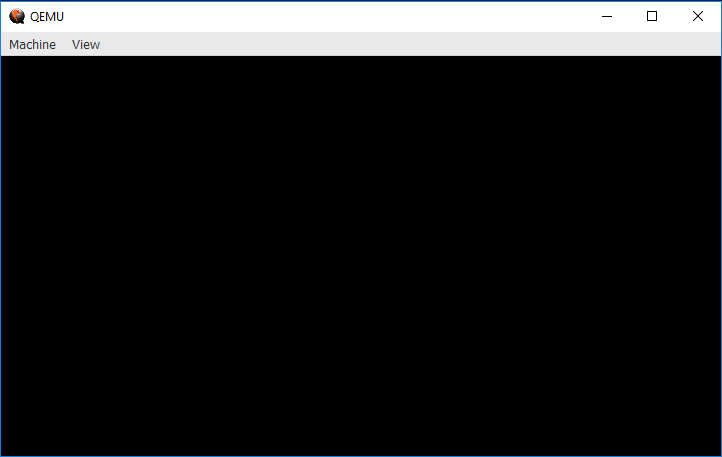
Hooray! Since our OS does nothing, we get a blank screen. To be clear, this is emulating hardware, and our OS is running on it, on our own computer. Excellent!
Let's step back slightly and go over what that command does:
qemu-system-x86_64
qemu installs virtual machines for all kinds of systems, we specifically
want an x86_64 machine, so we need to invoke the command that will start
it.
-drive
This parameter sets up a disk drive for our virtual machine. We need one of those so that it knows what to actually load.
format=raw,file=bootimage.bin
This is the value of the -drive parameter. It's split into two parts; the
first is that we want the format to be 'raw', that is, just use the bytes
directly, it's not formatted as a specific filesystem. The second is the file
that we want to actually load for that disk; it's our bootimage.bin file we
just produced with bootimage.
Some conveniences
bootimage can make this even easier! Go to your Cargo.toml, and add
this section:
[package.metadata.bootimage]
default-target = "intermezzos.json"
If you named your JSON file something different, use that name.
Once we've done this, we can do:
$ bootimage build
$ bootimage run
With this, bootimage build will default to --target=intermezzos.json, and
bootimage run will run the same Qemu command we've been using so far. This
is much more convenient!
For more info, see bootimage's documentation.
Conclusion
Congrats! This is the first step on our journey building operating systems. It only gets cooler from here. But before we move on, let's take a step back and investigate in a bit more depth what we actually just did.