Running in QEMU
Let’s actually run our kernel! To do this, we’ll use QEMU, a full-system emulator. Using QEMU is fairly straightfoward:
$ qemu-system-x86_64 -cdrom os.iso
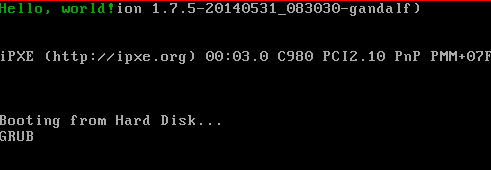
Type it in, hit Enter, and you should see Hello, world! (To exit, hit
Alt+2 and type quit in the console.)
If it shows up for you too, congrats! If not, something may have gone wrong. Double check that you followed the examples exactly. Maybe you missed something, or made a mistake while copying things down.
Note all of this other stuff behind the Hello World message: this part may look different, based on your version of GRUB, and also since we didn’t clear the screen, everything from GRUB just stays as it is. We’ll write a function to do that eventually...
Let’s talk about this command before we move on:
qemu-system-x86_64
We’re running the x86_64 variant of QEMU. While we have a 32-bit kernel for
now, soon we’ll have a 64-bit one. And since things are backwards compatible,
this works just fine.
-cdrom os.iso
We’re going to start QEMU with a CD-ROM drive, and its contents are the
os.iso file we made.
That’s it! Here’s the thing, though: while that wasn’t too complicated, it was a lot of steps. Each time we make a change, we have to go through all these steps over again. In the next section, we’ll use Make to do all these steps for us.